• Hello everybody! We have tons of new awards for the new year that can be requested through our Awards System thanks to Antifa Lockhart! Some are limited-time awards so go claim them before they are gone forever...

    CLICK HERE FOR AWARDS

Mega Man X is Ready to Rock! 100% Guide (w/Achievements) for the series!


REGISTER TO REMOVE ADS
Joined
Nov 30, 2020
Messages
79
Awards
2
Well everyone, it's finally here! I completed the Mega Man X3 100% All Achievements run, I'll be submitting it to the leaderboards, and the LP is soon to come! And don't worry—the LP will be using a different boss route, especially during the midgame. You won't be spoiling yourselves too much by watching it. Happy day after New Years, and God bless!

MMX3.png


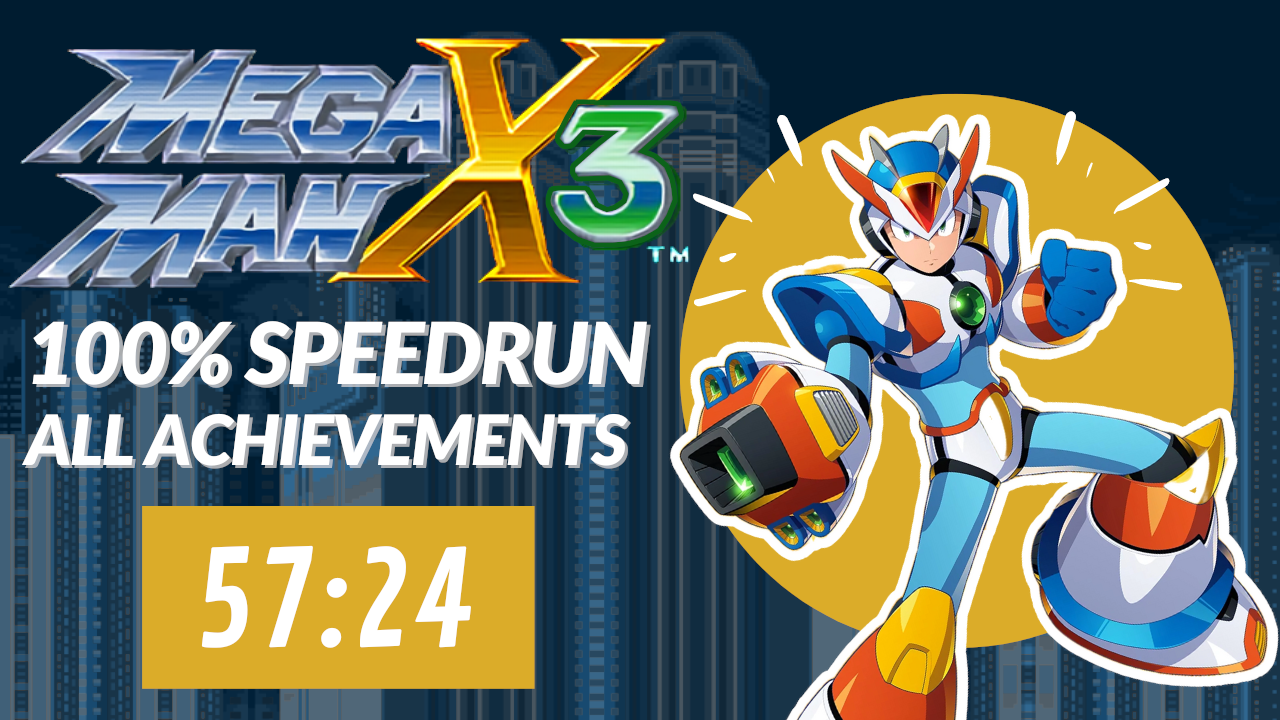
Mega Man X3—100% Speedrun with All Achievements/Trophies/Hunter Medals (57:24.114)

THUMBNAIL ART BY: Opacous (a good friend of mine)

ACHIEVEMENTS LIST:
1) "Speed Isn't Everything"—Reach Bit without a Ride Armor and win without the aid of special weapons.
2) "Power Isn't Everything"—Reach Byte without a Ride Armor and win without the aid of special weapons.
3) "Fight Fair!"—Destroy Vile MK-2's Ride Armor (DRA-00).
4) "Persistence Isn't Everything"—Reach Vile MK-2 without a Ride Armor and win without the aid of special weapons.
5) "All Units Stand By"—Obtain all four Ride Armor chips.
6) "Third Armor"—Obtain all four armor parts.
7) "Always Believe in Your Soul"—Obtain the Hyper Chip.
8) "He Wanted You to Have This"—Receive Zero's beam saber.
9) "X-Treme Danger"—Defeat Kaiser Sigma without the Hyper Chip.
10) "It's Over...Right?"—Defeat Kaiser Sigma.
11) "To Save Mankind"—Watch the ending credits until the "Thank You for Playing" screen [skipped due to redundancy]
 
Last edited:
Joined
Nov 30, 2020
Messages
79
Awards
2
Well guys, the Enigma has finally been solved! Here's how to make it always work, with 0 Parts, on every release of Mega Man X5!

Mega Man X5: How to GUARANTEE Enigma Cannon Success with 0 PARTS, on EVERY Console!

Volunteers (credited at the end of the description) have tested this on every single console — it always succeeded, even with 0 Parts. Just follow the video and you will too! This is extremely useful, for the following reasons.

----------------------------------------------------------------------------------
1) You can earn the "Out of the Frying Pan, Into the Fire" achievement on Legacy Collection.

2) Speedruns are now viable without needing to play the Playstation or X-Collection versions (which used the Demo to get the RNG right).

3) You can immediately get the Ultimate Armor from the capsule in Zero Virus Stage 3 without fear of getting locked into the Bad Ending. Just stomp the final level and enjoy the Good Ending!

4) This also speeds up 100% runs, thanks to having the Ultimate Armor. Just get Black Zero & Ultimate Armor, then collect all armor parts, items, and collectibles from the first 8 mavericks!
----------------------------------------------------------------------------------

So to re-iterate the video, here are the instructions:

----------------------------------------------------------------------------------
Step 1: Start a new game, play the intro level, beat Sigma, and save your game immediately (unless you're on Xbox One — in that case, get one game-over in Squid Adler/Volt Kraken's stage before saving).

Step 2: Restart your game, load your save file, then enter Volt Kraken

Step 3: Hold the following arrows to lose six lives (with one Continue used) via Volt Kraken's instant death pits.

---PS1: → → Nothing Nothing Nothing Nothing

---PS2, GameCube, & PS4: → ← ← ← ← ←

---All Other Versions: → ← Nothing Nothing Nothing Nothing

Step 4: Fire the cannon and watch the Space Colony blow up!
----------------------------------------------------------------------------------

SPECIAL THANKS TO THESE VOLUNTEERS FOR TESTING THE FOLLOWING CONSOLES:

PS1: Bouser

PS4: Kino

Switch: B-0, Sotenga, & MisterMatthias

Steam: Lightbox

Xbox One: NinjaDelphox

I PERSONALLY TESTED THE FOLLOWING:

PS1, PS2, GameCube, & Steam
 
Last edited:
Joined
Nov 30, 2020
Messages
79
Awards
2
Yo, guess what time it is? It's time for Mega Man X3 Walkthrough, co-starring the lovely and beautiful Forneia!

For this one, I'll also show how to get the unofficial trophies from Retroachievements (including stuff like doing No Damage on most of the bosses). I also use a boss order that balances speed with easiness. Finally, I'm playing on the SNES, but with the CD cutscenes spliced in. I even plan on using the Japanese credits song, once we reach the end.

Enjoy, everyone!

X3.jpg


Mega Man X3 (SNES) 100% Walkthrough, Part 1: Intro Stage & Boss Order

Time stamps are at the bottom.


THUMBNAIL ART BY: Innovator123
Special thanks to him for giving me permission to use it!
The uncropped version of this, as well as his complete art gallery, can be found at...

Deviant Art: https://www.deviantart.com/innovator123/gallery
Instagram: https://www.instagram.com/innovator123/
Pixiv: https://www.pixiv.net/en/users/16439829
Tumbler: https://www.tumblr.com/innovator-123

His Twitter can also be found at: https://twitter.com/ArmandoSionosa


WHAT HAPPENS IN THIS EPISODE:
Here we enjoy the opening cinematics, and then the text crawl. There we learn that Dr. Doppler is this game's new villain — replacing Sigma from X1-2.Then we start the beginning level and see the value of "damage boosting". This is where one dashes past all the opposition by purposely taking hits in order to abuse invincibility frames. Note that this only works for levels with relatively weak enemies.

After a mid-level cutscene, we start playing as Zero! I show off how he can store **three** powerful attacks, instead of just one... Including a beam saber swing! He then dispatches a mini-boss in two different ways. One is a speedrun strategy that shows how broken the Z Saber is; the other demonstrates how much damage each type of buster shot does.

Then we regain control of X, and fight a rather pitiful boss. Its opening attack can make No Damage runs very hard, though... So I show how to dodge if it attacks immediately.

Finally, I explain what boss route I'm going to use for this playthrough, while explaining why I'm not following the weakness order. Then we finish things by listening to some awesoe outro music, courtesy of Dracula9AntiChapel. He is an awesome remixer of the X series, the Zero series, Castlevania, Mother, Final Fantasy VI, and others. Check him out—he's got a LOT of great stuff!


FAST AND EASY BOSS ORDER (made for this walkthrough):
Tunnel Rhino → Blizzard Buffalo → Blast Hornet → Neon Tiger → Volt Catfish → Tunnel Rhino Revisit → Crush Crawfish → Toxic Seahorse → Gravity Beetle


SPEEDRUN BOSS ORDER (made for 100% speedruns):
Tunnel Rhino → Blizzard Buffalo → Neon Tiger → Gravity Beetle → Toxic Seahorse → Blast Hornet → Volt Catfish → Crush Crawfish → Gravity Beetle Revisit → Tunnel Rhino Revisit


WEAKNESS BOSS ORDER (horribly slow):
Blizzard Buffalo → Toxic Seahorse → Tunnel Rhino → Blizzard Buffalo Revisit → Volt Catfish → Crush Crawfish → Neon Tiger → Tunnel Rhino Revisit → Toxic Seahorse Revisit → Gravity Beetle → Volt Catfish Revisit → Blast Hornet → Crush Crawfish Revisit → Gravity Beetle Revisit


ENEMIES (Intro Stage):
X3.png
Notor Bangers: 9 HP [2 Damage with All Attacks. Vulnerable to Gravity Well & Parasitic Bomb.]

X3.png
Caterkillers: 5 HP [2 Damage on contact, 3 Damage with electricity or orbs. Vulnerable to Gravity Well & Parasitic Bomb.]

X3.png
Helits: 5 HP [2 Damage on contact, 3 Damage with missiles. Vulnerable to Gravity Well & Parasitic Bomb.]

X3.png
Head Gunners (Custom): 18 HP [1 Damage with projectiles, 6 Damage on contact. Vulnerable to Parasitic Bomb.]


BOSSES:
X3.png


Mac:
HP: 32
Damage: 2 (All Attacks)
Invincibility Frames: ~0.97 seconds' worth per hit.
Other Info: Takes as much damage per shot as a normal enemy.

X3.png


Maoh the Giant:
HP: 32
Damage: 1 (Mace)
Invincibility Frames: ~0.97 seconds' worth
Other Info: Takes 2 DMG from basic shots, 3 DMG from Dash Shots & Half-Charges, and 4 DMG from Full-Charges. Will only attack if it at the bottom of its bobbing up and down.

TIMESTAMPS:
00:00 Opening Cutscenes
02:36 Text Crawl
05:47 Intro Stage (X)
07:49 Intro Stage (Zero)
08:20 Mac Fight
09:25 Maoh the Giant Fight
10:54 Boss Order Discussion
11:59 Outro
 
Joined
Nov 30, 2020
Messages
79
Awards
2
Alright, time for our first two Maverick bosses, as well as our first time seeing Dr. Doppler in the flesh!

X3_Carddass_BlizzardBuffalo.jpg


Mega Man X3 (SNES) 100% Walkthrough, Part 2: Tunnel Rhino & Blizzard Buffalo

Time stamps are at the bottom.

WHAT HAPPENS IN THIS EPISODE:
Here we enter Tunnel Rhino's stage, and note just how much more durable and deadly the enemies are, compared to X1-2. We snag a Sub-Tank, see our first "Bit & Byte room", and take on the mini-boss called the Hell Crusher. We defeat it with the same strategy I used in my All Achievements speedrun. Then we switch to Zero and show off just how awkward his charge shots and Z Saber are to use, and then talk about his greatest weakness: The fact he's permanently locked off if he dies even once... At least, if you don't know how to use the exploit I showed off at 7:55.

From there we defeat the Hell Crusher again, this time using a more conventional strategy, and proceed through the same area Zero died in — this way I show just how much easier X is to handle. Then we defeat Tunnel Rhino twice — one time with us having died once, and the other time with us not having died at all. The reason for that is because of a glitch: If you reach him without dying, his AI is bugged out of using one of his attacks.

After that is Blizzard Buffalo. We use the Tornado Fang to collect a Heart Tank, show off two ways of making the Dash Jump to the Leg Parts, and show the very inconveniently placed respawn points waiting below if you fail the jump. From there we backtrack to the Sub Tank we passed up, using our new upwards Air Dash to snag it. Then we defeat Buffalo twice. The first time, I use my knowledge of his AI to trivialize him completely, and the second time, I show how it's *supposed* to go.

Finally, we see a cutscene with Dr. Doppler, who is very heavily implied to be serving Sigma. We also get introduced to this game's equivalent of the X-Hunters: Bit, Byte, & a newly revived Vile. Then we finish things by listening to some awesome outro music, courtesy of Dracula9AntiChapel!

ENEMIES:

Tunnel Rhino:

X3 Ganseki Carrier (small).png
Ganseki Carriers: 12 HP. Weak to Gravity Well & Parasitic Bomb.
X3 Iwan De Voux (small).png
Iwan De Vouxs: 9 HP for shell; 10 for core. Full Charges hit both shell & core.

X3 Drill Waying (small).png
Drill Wayings: 15 HP. Never drops health or ammo.
X3 Drimole-W (small).png
Drimole-Ws: 18 HP. Drills block all attacks.

X3 Wall Cancer (small).png
Wall Cancers: 12 HP. Weak to Gravity Well & Parasitic Bomb


Bilzzard Buffalo:
X3 Helit (small).png
Helits: 5 HP. Weak to Gravity Well & Parasitic Bomb.
X3 Notor Banger (small).png
Notor Bangers: 9 HP. Weak to Gravity Well & Parasitic Bomb.
X3 Ice De Voux (small).png
Ice De Vouxs: 9 HP for shell; 10 for core. Full Charges hit both shell & core.
X3 Snow Rider (small).png
Snow Riders: 9 HP.
X3 Snow Slider (small).png
Snow Sliders: 9 HP. Spawns a Snow Rider when slain.


MINI-BOSS:
X3 Hell Crusher (small).png


Hell Crusher:
HP: 32
Damage: 2 (Contact), 3 (Claw)
Invincibility Frames: None
Other Info: Rams you if you're on the ground. Uses claw if you're in the air.


BOSSES:
X3 Tunnel Rhino (small).png


Tunnel Rhino:
HP: 32
Damage: 3 (Contact), 4 (Drills), 5 (Invincible Dash)
Invincibility Frames: ~0.97 seconds' worth
Other Info: Only does Invincible Dash at 11 HP or less. Never uses Drills if you reach him without dying.

X3 Blizzard Buffalo (small).png

Bilzzard Buffalo:
HP: 32
Damage: 0 (Ice Beam), 3 (Icicles), 5 (Ramming), 5 (Contact)
Invincibility Frames: ~0.97 seconds' worth
Other Info: AI is reactive and exploitable. Only does Ice Beam at 15 HP or less. Icicles have 6 HP.

TIMESTAMPS:
00:00 Tunnel Rhino Cutscene
00:28 Tunnel Rhino Stage (Part 1)
02:00 Hell Crusher Mini-boss (Speedrun Strat)
02:26 Why Zero Stinks
03:58 Hell Crusher Mini-boss (Normal Strat)
04:35 Tunnel Rhino Stage (Part 2)
05:17 Boss Fight (With Normal AI)
06:38 Boss Fight (With Bugged AI)
07:55 How to Revive Zero
08:51 Blizzard Buffalo Cutscene
09:20 Blizzard Buffalo Stage
13:32 Boss Fight (Speedrun Strat)
14:19 Boss Fight (The way it was intended)
16:00 Dr. Doppler Cutscene
17:52 Outro
 
Joined
Nov 30, 2020
Messages
79
Awards
2
Here we unlock Ride Armors, get the Arm Upgrade, and fight the first of Doppler's Nightmare Police!

Zero vs Bit (final).png


Mega Man X3 (SNES) 100% Walkthrough, Part 3: Blast Hornet, Neon Tiger, & Bit

Time stamps are at the bottom.

WHAT HAPPENS IN THIS EPISODE:
Here we enter Blast Hornet's stage, and see what makes Ice Shield the best weapon since X1's Storm Tornado & Chameleon Sting. From there, we discover a Ride Armor platform we can't use until we physically find the one in this stage.

We also find the first of four Enhancement Chips—upgrades to our upgrades. It is the Head Enhancement, which very slowly refills your health and/or Sub Tanks if you stand still. But, only one of four can be acquired in a game, and they all permanently lock out the game's ultimate armor... Thus we skip them.

Next we face the mini-boss called Shurikein, then find the robot suit that unlocks the others. But, since it's an All Achievements run, we cannot use it till Bit, Byte, & Vile are all beaten.

Then we defeat Blast Hornet—a relatively simple boss, so long as you know how to easily shred its bees in Phase 2. If you do not, you can still damage race her, for she doesn't hit very hard.

Afterward is Neon Tiger. We get the Arm Parts... Which are unfortunately more of a side grade than an upgrade. We easily destroy the Worm Seeker-R mini-boss with Ice Shields, then face Bit twice. The first battle shows off how easy he can be; the second is a proper No Damage fight with only the Buster. I then do the same with Neon Tiger.

Finally, I demonstrate Neon Jumps, which lets you double and triple jump with the Leg & Arm Upgrades.

ENEMIES:

Blast Hornet:

X3 Notor Banger (small).png
Notor Bangers: 9 HP. Weak to Gravity Well & Parasitic Bomb.

X3 Head Gunner Custom (small).png
Head Gunners (Custom): 18 HP. Weak to to Parasitic Bomb.
X3 Helit (small).png
Helits: 5 HP. Weak to Gravity Well & Parasitic Bomb.


Neon Tiger:
X3 Tombort (small).png
Tomborts: 18 HP. Weak to Gravity Well & Parasitic Bomb (9 DMG)
X3 Wild Tank (small).png
Wild Tanks: 18 HP. Weak to Parasitic Bomb.


X3 Hamma Hamma (small).png
Hamma Hamma: 31 HP. Maces block attacks.


X3 Drill Waying (small).png
Drill Wayings: 15 HP. Never drops health or ammo.
X3 Notor Banger (small).png
Notor Bangers: 9 HP. Weak to Gravity Well & Parasitic Bomb.

X3 Caterkiller (small).png
Caterkillers: 5 HP. Weak to Gravity Well & Parasitic Bomb.
X3 Meta Capsule (small).png
Meta Capsules: 5 HP. Weak to Parasitic Bomb.
X3 Atareeter (small).png
Atareeters: 30 HP. Weak to Parasitic Bomb.


MINI-BOSS:
X3 Shurikein (small).png


Shurikein:
HP: 18
Damage: 3 (Contact)
Invincibility Frames: Yes
Weakness: Acid Burst
Other Info: Attack pattern is fixed and comes in 3 parts. Always jumps in response to your shots in Phase 1.

X3 Worm Seeker-R (small).png


Worm Seeker-R:
HP: 64 (the mines have 10)
Damage: 2 (Mines), 3 (Contact)
Invincibility Frames: No
Other Info: Takes damage like a regular enemy. Moves in a set pattern.


BOSSES:
X3 Blast Hornet (small).png


Blast Hornet:
HP: 32 (the 1st phase bees have 6, the 2nd phase bees have 3)
Damage: 2 (Bomb Bees), 3 (Contact), 8 (Stinger)
Invincibility Frames: Yes
Weakness: Gravity Well
Other Info: Goes to 2nd Phase at 19 HP or less.

X3 Bit (small).png


Bit:
HP: 32
Damage: 1 (Contact), 3 (Sabre), 4 (Fireball)
Invincibility Frames: Yes
Weaknesses: Ice Shield & Triad Thunder
Other Info: He'll be killed if the last hit's with a weakness. Otherwise, he retreats.

X3 Neon Tiger (small).png


Neon Tiger:
HP: 32
Damage: 2 (Ray Splasher), 3 (Contact), 8 (Slash)
Invincibility Frames: Yes
Weakness: Spinning Blade
Other Info: Sometimes turns invincible at 9 HP or less. Blocks all charge shots if they come when he's standing and not attacking.

TIMESTAMPS:
00:00 Blast Hornet Cutscene
00:32 Blast Hornet Stage (Part 1)
01:24 Why You Skip Enhancement Chips
02:42 Shurikein Mini-boss
03:28 Blast Hornet Stage (Part 2)
06:03 Boss Fight
07:52 Neon Tiger Cutscene
08:18 Neon Tiger (Part 1)
10:13 Worm Seeker-R Mini-boss
10:44 Neon Tiger (Part 2)
11:31 Bit (Speed Strat)
12:26 Bit (No Damage Buster Strat)
13:33 Neon Jumps Demonstration
14:30 Boss Fight (No Damage Strat)
16:37 Boss Fight (Easy Strat)
17:44 Outro
 
Back
Top